Server酱推送服务器部署
1.企业微信创建企业就不说了,自己创建。在我的企业最下面记一下企业id。
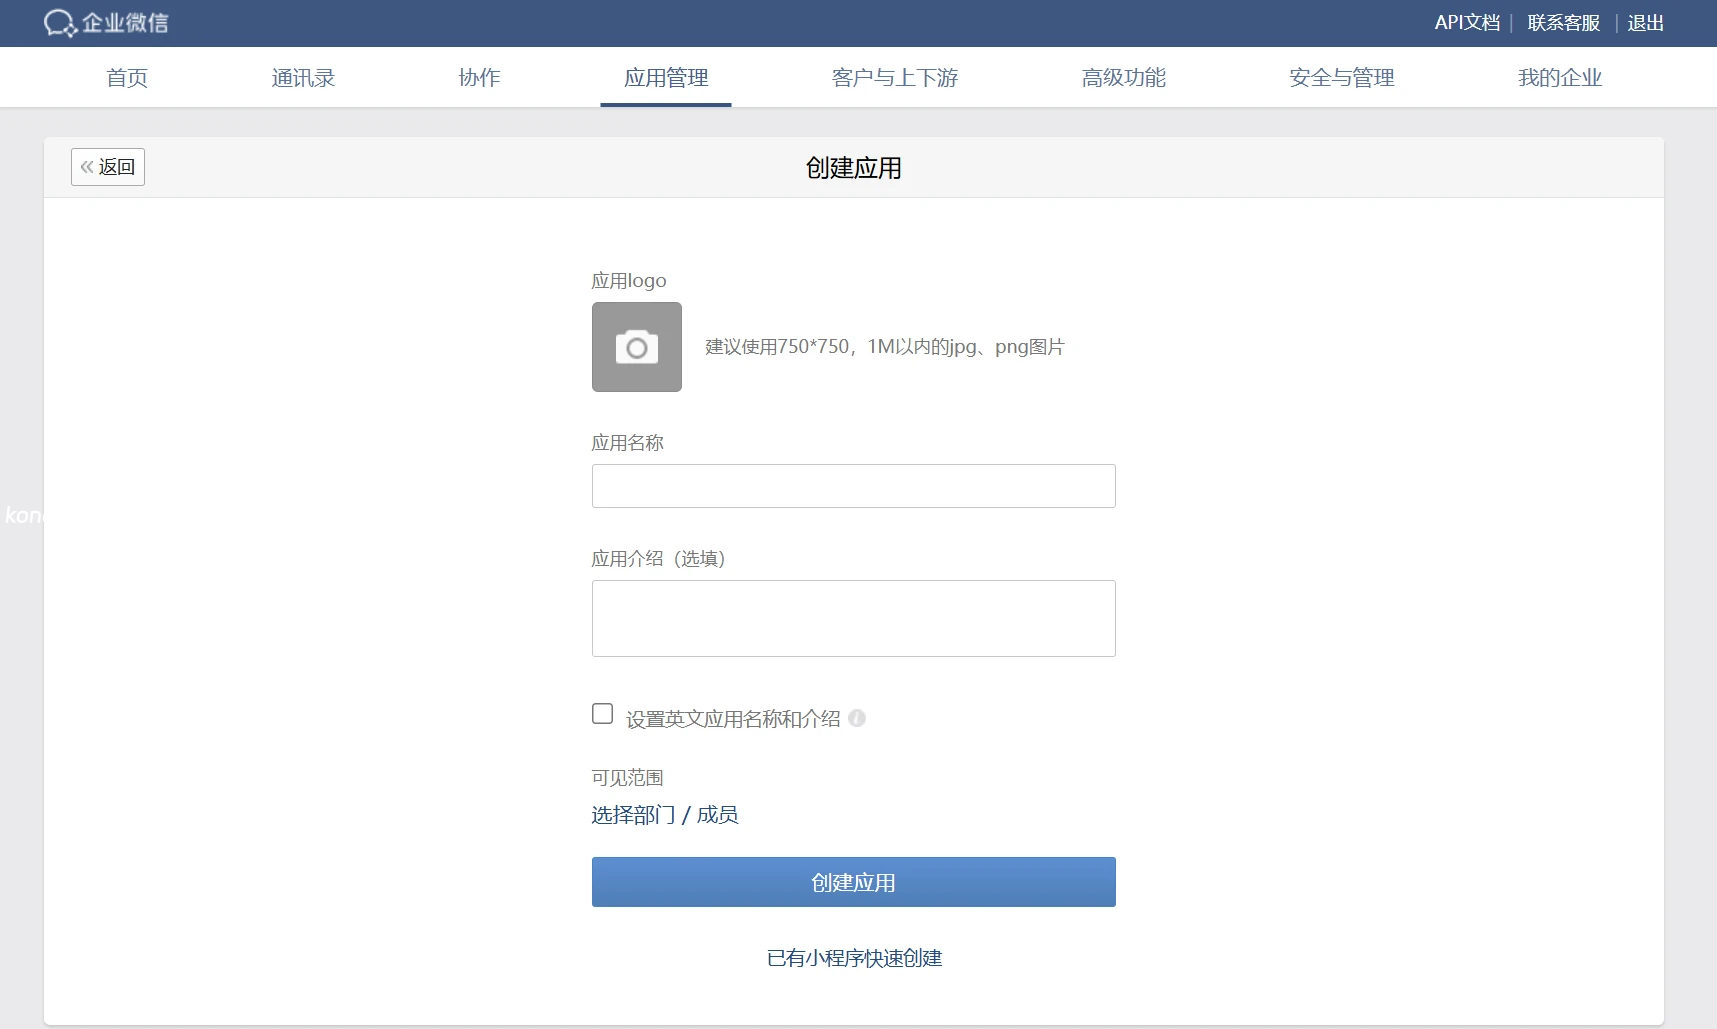
2.创建应用。在应用管理→自建那里找到创建应用,选择logo,填写应用名称

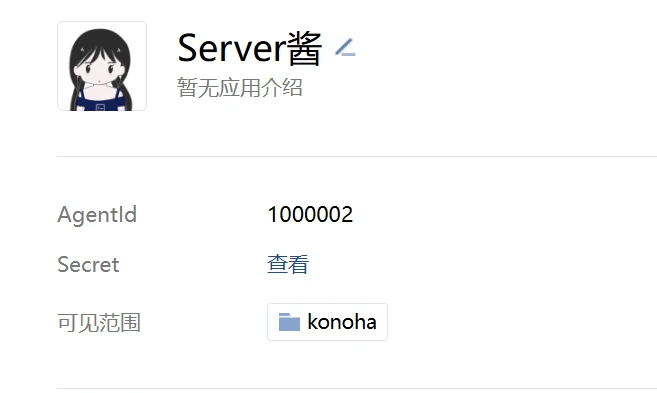
点开创建的应用记住AgentId,点击Secret后面查看,将会推送到企业微信客户端,也需要记住。可见范围选企业名。

底部开发者接口,点击企业可信IP,填写可信IP,需要先填写可信域名,会给你个文件,上传到可信域名解析的网站的根目录验证即可。
3. 服务端配置。openresty编译安装可参考以前文章,如需通过源安装可参考openresty官网。
php安装
apt install libapache2-mod-php8.2 php-common php8.2 php8.2-cli php8.2-common php8.2-curl php8.2-fpm php8.2-gd php8.2-igbinary php8.2-imagick php8.2-intl php8.2-mbstring php8.2-mysql php8.2-opcache php8.2-readline php8.2-xml php8.2-zipopenresty配置
user  www-data;
worker_processes  auto;
pid        logs/nginx.pid;
events {
    worker_connections  65535;
}
http {
    include       mime.types;
    default_type  application/octet-stream;
    charset                utf-8;
    sendfile on;
    tcp_nopush on;
    tcp_nodelay on;
    keepalive_requests 1024;
    types_hash_max_size 2048;
    server_tokens off;

    upstream php {
        server unix:/run/php/php8.2-fpm.sock;
    }
    server {
        http2 on;
        listen 443 ssl;
        server_name i.konoha.cc;
        root /var/www/html;
        index index.html index.htm index.php;

        add_header X-XSS-Protection          "1; mode=block" always;
        add_header X-Content-Type-Options    "nosniff" always;
        add_header X-Frame-Options "SAMEORIGIN" always;
        add_header Referrer-Policy "strict-origin";
        add_header Referrer-Policy           "no-referrer-when-downgrade" always;
        add_header Set-Cookie "Path=/; HttpOnly; Secure; SameSite=Lax";
        add_header Strict-Transport-Security "max-age=63072000; includeSubDomains; preload" always;

        ssl_session_timeout    1d;
        ssl_prefer_server_ciphers on;
        ssl_ecdh_curve X25519:P-256:P-384;
        ssl_session_cache builtin:1000 shared:SSL:10m;
        ssl_buffer_size 1400;
        ssl_protocols         TLSv1.3;
        ssl_ciphers            ECDHE-ECDSA-AES128-GCM-SHA256:ECDHE-RSA-AES128-GCM-SHA256:ECDHE-ECDSA-AES256-GCM-SHA384:ECDHE-RSA-AES256-GCM-SHA384:ECDHE-ECDSA-CHACHA20-POLY1305:ECDHE-RSA-CHACHA20-POLY1305:DHE-RSA-AES128-GCM-SHA256:DHE-RSA-AES256-GCM-SHA384;
        ssl_certificate /opt/server.crt;
        ssl_certificate_key /opt/server.key;
        ssl_dhparam /opt/dhparam.pem;

        error_page   500 502 503 504  /50x.html;
        location = /50x.html {
            root   html;
        }
        location / {
            try_files $uri $uri/ /index.php?$args;
        }
        location ~ \.php$ {
            fastcgi_pass unix:/run/php/php8.2-fpm.sock;
            fastcgi_index index.php;
            fastcgi_param SCRIPT_FILENAME $document_root$fastcgi_script_name;
            include fastcgi_params;
        }
    }
    server {
        listen 443 ssl default_server;
        http2 on;
        server_name _;
        ssl_reject_handshake on;
    }
}
自己生成dhparam.pem
openssl dhparam -out /opt/dhparam.pem 2048ssl_certificate、ssl_certificate_key使用申请的域名证书或者自签名的。有空写一篇自签名域名证书。
/var/www/html下放index.php。
index.php里面SENDKEY、WECOM_CID、WECOM_SECRET、WECOM_AID后面值自己改一下,sendkey自己填一个,剩下三个分别对应刚才创建企业和应用时的企业ID、agentId、推送到企业微信客户端的secret。

只说一点,php版参数注意一下get请求http://指向运行环境的域名/?sendkey=你设定的sendkey&msg=你要发送的内容,是msg不是text。
post请求安全一点。
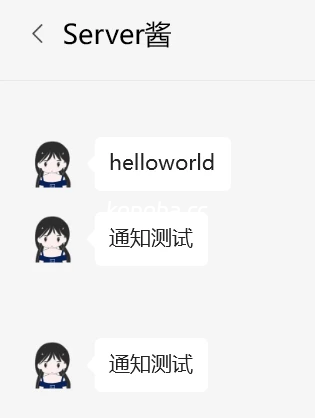
curl -X POST -d "sendkey=你设置的sendkey&msg=通知测试" https://域名/效果图

阅读剩余
版权声明:
作者:konoha
链接:https://konoha.cc/server%e9%85%b1%e6%8e%a8%e9%80%81%e6%9c%8d%e5%8a%a1%e5%99%a8%e9%83%a8%e7%bd%b2.html
文章版权归作者所有,未经允许请勿转载。
THE END